Translate

Monday, November 30, 2015

Final Project for My Besties Meet at the Scrappers Corner

Hey everyone!
This is my final DT project with My Besties Meet at the Scrappers Corner

Beginning next month I will become the DT Coordinator at
We would love for you to come and visit us and see all
the fun changes and projects we will have for you
beginning in the new year.
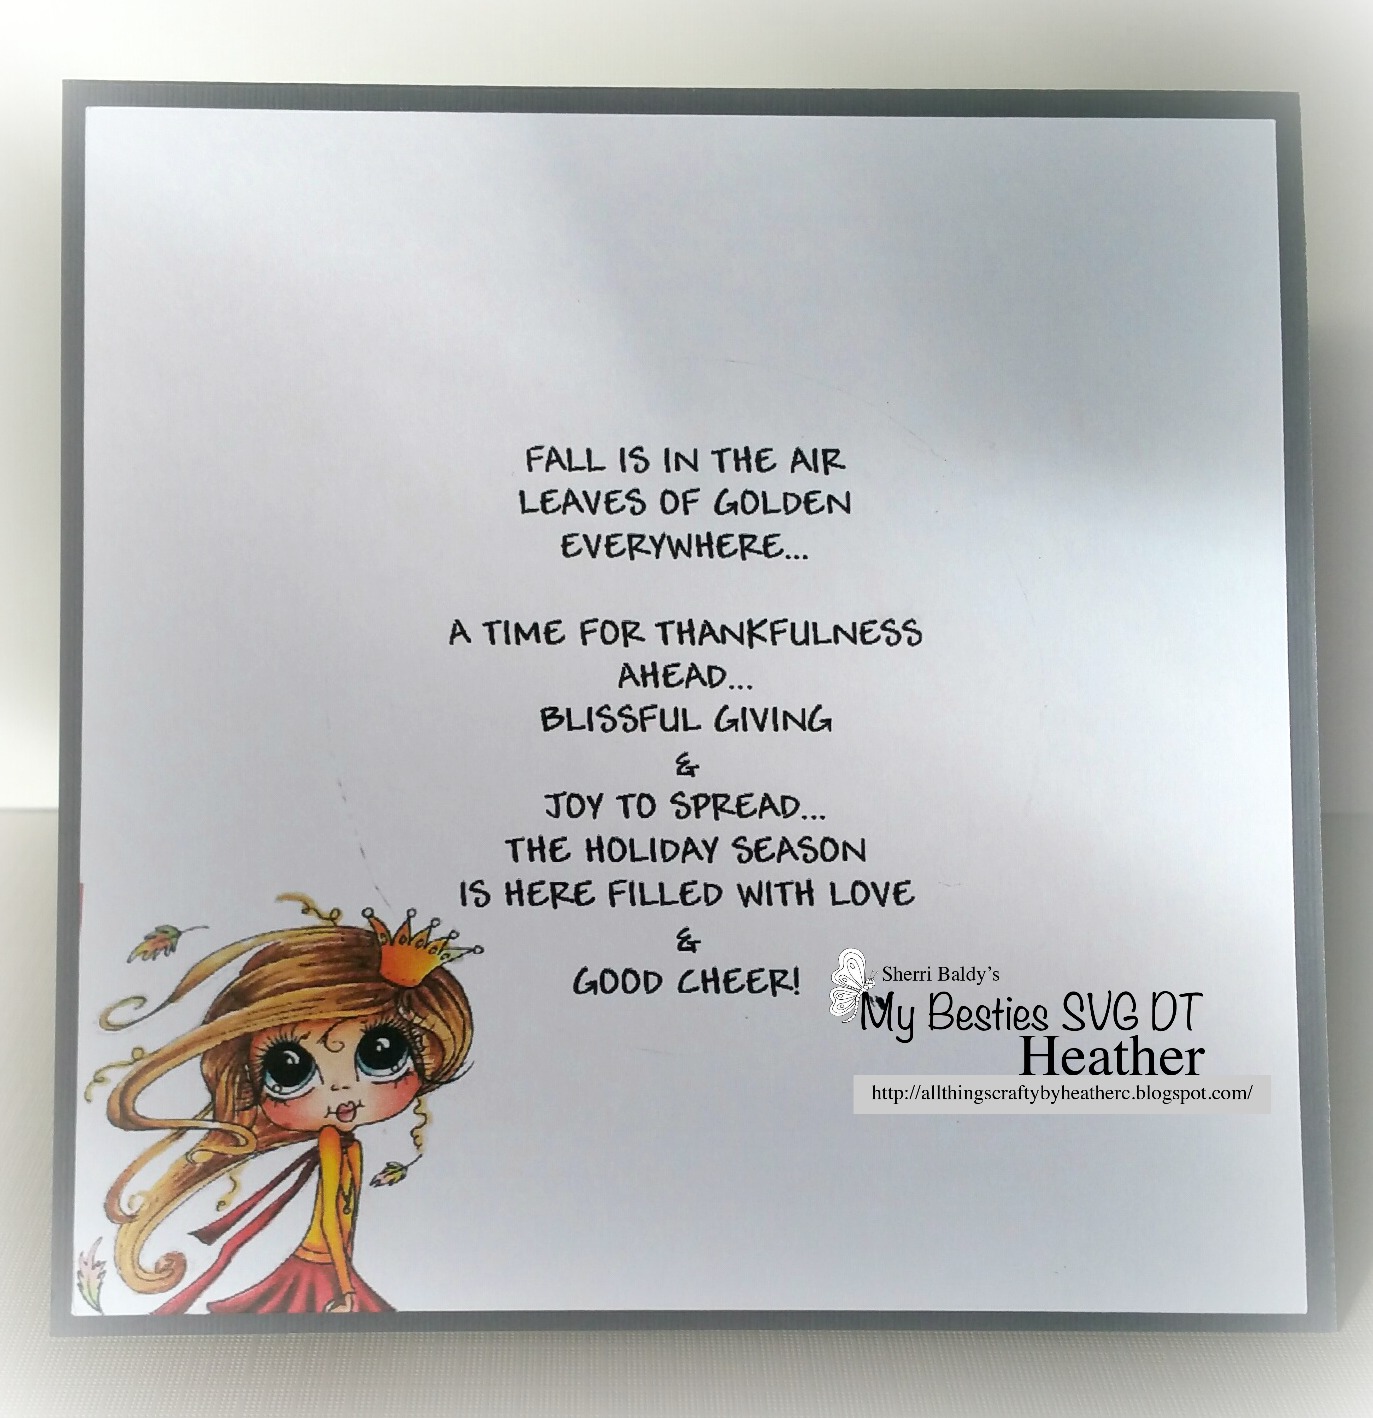

Here is my project


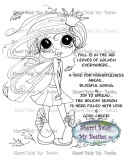
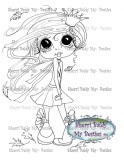
I am using scan 0005 Best Besties Forever

I used distress markers for the first time on this image.
I used Tim Holtz Distress Markers in
Stormy Sky
Picked Raspberry
Ripe Persimmon
Forest Moss
Mowed Lawn
and a mini Distress Ink in Festive Berries


I used a Spellbinders die to cut her out and then mounted it on another
Spellbinders die panel from Devine Elegence A2 card creator.


I added some gems with the paper flowers that I added glitter to for some
sparkle.  I just took a black ribbon and strung the gems onto and tied a knot to hold them on.

Happy crafting

xoxo

Heather


Saturday, November 28, 2015

SVG Saturday/Christmas is on it Way

Hey everyone!!!  It is time for SVG SATURDAY

Today I have for you the tree and window SVG.  These are adorable
and can be used in a variety ways.


The tree and window are separate SVGs so change the placement or resize
the tree and make more trees.


I also used August Printable 2 Dear Santa and turned her into a 3D.


To finish this off, I also have used Sherri Baldy's Designer Paper


Come check out all the wonderful SVG projects today!!!
There are many ways to use all these SVGs and we would
love to see what you create as well!

Happy crafting

xoxo

Heather


Saturday, November 21, 2015

Wishing for a Pink Christmas

Hey everyone!  It is SVG Saturday for

Today I have used 2 SVGs for this and love all the ideas you could make with them.


First we have the stamp SVG
You could use the stamp for so many ideas especially with the card stamp
in this set.


Second we have the snowflake border SVG.


Also on this project I have use the new Pink Christmas papers


You can also check out all of the Designer paper packs available HERE
Dont want to print them,  Don't worry find the actual packs HERE

We would love for you to share what creations you make with any of 
My Besties SVGs.
Find them all HERE.

For more inspiration, come on over to 
or
Visit Pinterest for many more SVG projects.

Have a happy crafting day.

Heather


Wednesday, November 18, 2015

Color My World- NEW ZEN Release

Hey everyone!  I am loving this new ZEN line by
Sherri Baldy My Besties.  These are so fun to color and create.

Have fun with her and break out those markers or pencils and relax.
I wanted to give her color everywhere and just had fun with all the color options.


This is Img890


Come check out all the other ZEN art as well HERE

Happy crafting

xoxo

Heather

Tuesday, November 17, 2015

Christmas Zen

Christmas is coming and check out this NEW RELEASE
from Sherri Baldy My Besties.

Add some ZEN to your Christmas cards this year.


This is img885

I have used copics and prismacolor pencils on her.


Come and check out all the NEW RELEASES HERE


Happy crafting

xoxo


Heather


Pink Christmas Sparkle Friendship Pocket Letter

Hey everyone!  I am excited to share with you today a 
NEW pocket letter from Sherri Baldy My Besties.

I am also excited as this is my first attempt at PL's.
I find them intriguing and oh so fun.


I still have alot to learn with creating this little works of art, but am rather happy
with the way this one has been born.


For this row, I added Joy Craft Heart Border and cut it to just have two of the hearts.
I gave my pink tree some bling of it own with pink rhinestones and add
some Frantage embossing enamel in shabby white.
My cute little girl I made into a tag and cut her face out with a 1" punch and topped onto another matching paper.


For the second row I added a Darice die to my deer paper and also cut the snowflake out
with a 1" punch.
I used bubble gum pink ink to ink the edges on my center girl and also raised her with a 1.5" punch.
I added a snowflake onto the center of my paper in the first pocket.


For the bottom row, I wanted to show off some of the pocket papers.
The first pocket you have the cute paper in this pocket letter kit.
The middle pocket has a very wonderful designed paper that I stamped with the ornaments at top
and merry & bright  towards the bottom.  I just added glitter after stamping and love the shimmer.
The last pocket I added a lace rosette and topped with some die cut leaves from
Spellbinders foliage dies and then added a white rose.

I hope you have enjoyed this project.


Check out all the pocket letters available by Sherri Baldy My Besties HERE
and make sure to check out  My Besties Friendship Pocket Art & ATC on facebook.


Also would like to let you know that there is a DT CALL for DT members to join the
My Besties International Team.
You can find the information HERE


Happy crafting

xoxo

Heather


Sunday, November 15, 2015

DT CALL at My Besties International


There is currently a DT CALL for new team members at My Besties International.

To be considered as a new DT member, send an email to Heather at purpledaisy71@gmail.com and in the subject line add DT CALL.
Submissions accepted til November 30th.  We would like to have all new DT in place for the new year.

Check it out HERE


Happy crafting

xoxo

Heather

GDT for My Besties Germany Challenge Blog

Hey everyone!  I am excited to share with you a card
I made as a Guest DT for My Besties Germany Challenge Blog.
Come check it out and join in on the fun.

For this challenge I have made this winter creation inspirational card.


I am using img029


I have colored her copic markers.
Skin:  E50, 51, 53, 33
Hat, mittens: W0, 1, 3, 5
Ornament: BG10 and BG70 with glitter added.
I added some Frantage Embossing Enamel in Shabby White.


I used a six petal flower cutout to make these flowers and used
Spellbinders Shapeabilities Foliage for the leaves.
I distressed the edges of the flowers before shaping with Tim Holtz distress ink.
I also added some snowflakes, cut on my circut and added pearls to
the centers of them.


I hope you have enjoyed this project and hope to have you
visit again.

Happy crafting

xoxo

Heather


Saturday, November 14, 2015

Fall is in the Air

Hey everyone!  This year has seemed to have flown by through
the seasons.  Yet another one is upon us.  Where does the time go!

Today I have for you a sweet set of SVGs to mat or frame a picture
a sentiment or even a poem.  These are Sherri Baldy My Besties


I have used the circle open center frame twice in this project.
I added the first one directly around my window and for the second one
I used foam dots to mount the second slightly raised.


There are many more SVGs to create with.  Have a peek at them all HERE.

I also have use Sherri Baldy Designer Paper in Spring Peach


These papers are lovely to work with and offer a wonderful
selection to coordinate any project with.
Check out all of her selection in either Paper Packs or downloadable Paper Packs


For the inside of my card, I centered this poem to show through the frame.
The image comes with this poem and you get TWO digis in one with this one.


I hope you have enjoyed todays project and make sure to come
check out all the Wonderful SVG projects for
SVG Saturday over at My Besties Design Color & Create on Facebook.

Also you can check out many more projects with Sherri Baldy My Besties SVGs

Happy crafting

xoxo

Heather


Tuesday, November 10, 2015

Tuesday Color Challenge at the Outlawz

Hey everyone!  It is time for another fun filled week with the
Color Challenge for the Outlawz

Color Challenge is so excited to have as our sponsor for the month of
November


We have sadly learnt that Sweet Pea Stamps will cease to trade on November 25th so our winner will get 4 of the digis we have used!

This week it is my turn to host the challenge and I have chosen some fall colors  with
the use of a punch or punches also on your project.

The image I used will be available for this months digis to pick from.

I misplaced my leaf punch and went with the small flower on top 
of my twine as my punch.  And because I couldn't locate that darn
punch, I decided to add my leaf stamp onto the background by
embossing with holographic embossing powder

I colored the image with prismacolor pencils.

We would love for you to join us over at the Tuesday Color Challenge.
If you aren't already a member, just request to join and you can join us.
Simple as that.  Come check out all our challenges.
Happy crafting

xoxo
Heather

Saturday, November 7, 2015

Peek a Boo Tags

Christmas is coming and time to think about labeling those presents.

Today I have for you a peek a boo tag embellished with


I started with a standard tag, whatever shape you like, and cut a window for
viewing of the message inside.


To add some embellies, I used Ginderbread man and stocking set, bear mittens,
and the lollipop SVGs.


A fun and easy project to help you get ready for the Holiday Season.


Come check out all of the SVGs available. New ones are always being added.


Happy Crafting

xoxo

Heather


Give Thanks

Hey Everyone!!!  The colder weather has begun and
Thanksgiving is right around the corner.

Today I have for you a little note card with SVGs from


The SVGs I used for this is the pumpkin border set and the 


I started with a 4.25" x 5.5" card base.

I matted my sentiment onto Recollections Tomato cardstock
and  stamped leaves with embossing ink and used  a
holographic embossing powder.  It adds the leaves in a very
subtle way and leaves a very nice effect.
I took the layer scalloped border and sized to match my mat along with
the pumpkin border and cut with my Cricut Explore.
I used the Recollections coordinating paper pack Tomato for the scallops.
The pumpkins are cut from DCWV Lace & Line Stack pad.

There are many more wonderful SVGs available at

Come check them all out!


Happy Crafting

xoxo

Heather

Tuesday, November 3, 2015

Winter Woodland Boy

Hey everyone!  Today I have for you a little boy that just called out for
the woodland theme.  It is transitioning into colder weather here and
this is how I see him.


I am using a Sherri Baldy My Besties boy digi.
This is img705.


How did I put it all together.

I started with 6 x 6 card base and cut my first mat at 5.75" and topped with
a slightly smaller christmas patterned paper.  The next mat size is 4.5" topped
with another christmas patterned paper cut slightly smaller.
I added a few spruce trees onto the first layer and turned them in various
directions until I came up with a placement that I liked.  I embossed all the spruce
trees with a swiss dots embossing folder and used
 Frantage embossing enamel in Shabby White.
I embossed white cardstock with Tim Holtz border embossing folder of icicles and
cut out and placed at the top of the first layer.
I took my second layer and placed it in a position I liked to still show
some of the spruces.
I placed my boy down with foam dots.
I placed another spruce tree with foam dots over the second layer and one of the
spruce trees.
I then took my acorn and leaf clusters and added them.  They are from Spellbinders.

The little deer is a SVG from Sherri Baldy My Besties.  These SVGs are easily
done and work with all die cuts.

I just used the one deer.
Check out the SVGs available HERE

I stamped my sentiment and used a oval Spellbinders die to cut out.


His little jacket I colored to resemble my sons Carhart coat and his
pants as bluejeans.  Just what I would picture a boy wearing.
I took a prismacolor grey pencil in 50% and 30% to make his
trim look like fur.

Thank you for visiting!!

I have enter into challenges
xoxo

Heather


Monthly Progressive Challenge at the Outlawz

It's November!! A new month and a brand new Progressive challenge at the Outlawz.

Our image this month is so generously provided by SLS Lines. And we thank them for the awesome image. 


The image is Voodoo King.


This one was a challenge for me.  It isn't in my norm, and sometimes getting outside
your norm opens your mind to other ideas and brings a new element that
you may not of used before.  I colored him with copics and fussy cut to put
in front of my background.

***********************************************************************************
ABOUT OUR CHALLENGE:

We had a huge response for our October challenge.  If you took part in this progressive challenge in October, you will automatically receive by email the November image. If you didn't take part but want to, it is easy to join the fun.

First, you must be a member of the Outlawz. If you aren't a member, just drop by and ask to join. After your request is approved, you can join the Progressive Challenge or any of our other seven challenges.

Next, you will need to register to play. Do this by sending an email to the address on the challenge page with your name and email address and an email will be sent to you.
 

Rules: 
The rules are very simple: join the challenge, join the progressive/freebie group, send us an email to register and then enter a project made with the image supplied before 6:00 p.m. EST on the last day of the month and you will automatically get the next image. If for any reason you don’t get your project made and you would like to rejoin us, you can buy the image of the month from the sponsor's store and as long as you enter it before the end of the month you will get the next one free and you will then get them automatically each month you enter a project.
Please do not add your image to Pinterest, or your blog or anywhere it can be copied from without a watermark. You can not share these images with anyone – if your friends or family want them send them HERE to join in and get their image or if they don’t want to join the challenge please send them to the sponsor's store to purchase the image.
When you have made your project please place it onto the challenge page for November, enter it into the Gallery (use the tag PF12 for the November challenge) and the November Inlinkz to be entered into the draw for the site wide prizes from our other wonderful sponsors – check out the Outlawz side bar for this month’s prizes! 

***********************************************************************************
I have entered this into challenge
Forever Dark 2


Hope to see you there!

Happy crafting

xoxo

Heather